HighLevel / CRM / Setup
How to Set Up Your HighLevel Sub-Account Yourself: A Step-by-Step Guide
Set up a new HighLevel sub-account in the right order: business profile, users, billing and wallet, Google integrations, custom fields, tags, your first form, calendar and workflow, and the email domain that keeps you out of spam.
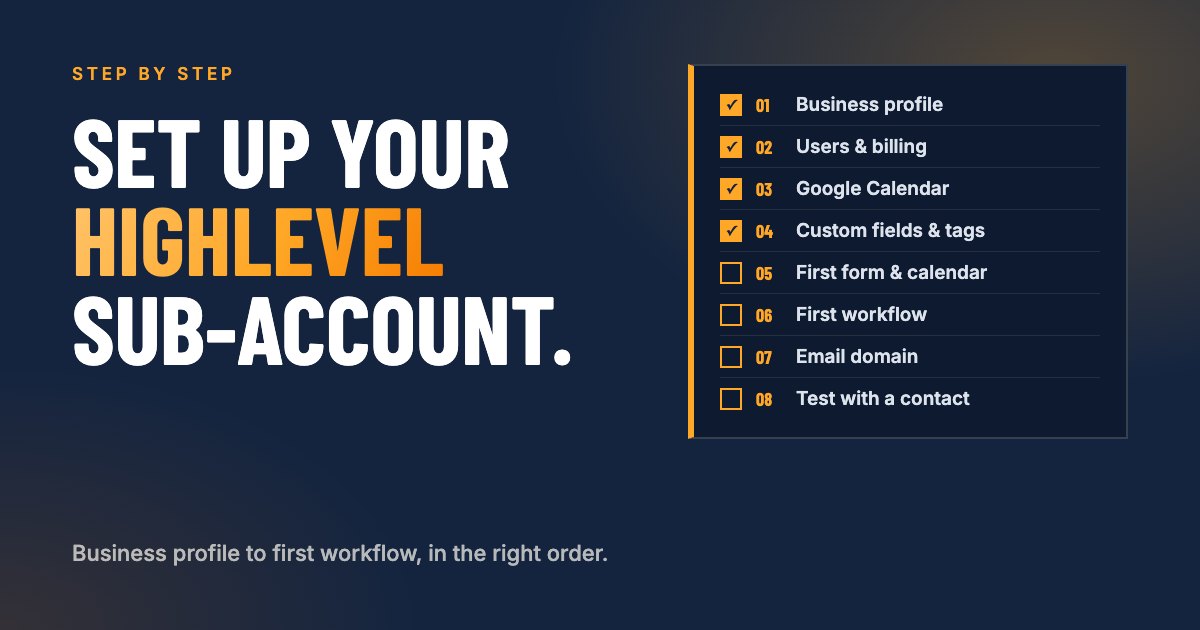
A new HighLevel sub-account can do almost anything: CRM, email, text, calendars, forms, websites, payments, reviews and AI. That is exactly why the first hour is confusing. Everything is available, nothing is set up, and the order you do things in decides whether your first leads arrive cleanly or end up as a mess you fix later.
This guide walks through the setup in the order that works: the settings that everything else depends on first, then the building blocks for capturing leads, then your first automation, then the email setup that keeps you out of the spam folder, and finally a full test with a real contact. At the end there is an overview of what to add next.
The short version: fill in your business profile and turn on the compliance settings, add your users, understand the wallet, connect Google, plan a few custom fields and an opt-in tag, then build one form, one calendar and one workflow that ties them together. Set up your email sending domain before you send anything in volume, and test the whole path with yourself as the first contact.
What is a HighLevel sub-account?
A HighLevel sub-account is one business’s own workspace inside HighLevel. It holds that business’s contacts, conversations, calendars, forms, workflows, websites and settings, completely separate from every other sub-account.
HighLevel is built for agencies, so the structure has two levels. The agency account sits on top and manages billing, templates and many sub-accounts. Each business gets its own sub-account underneath. If you bought a CRM account from an agency or a consultant, what you log into is a sub-account, and that is what this guide sets up.
Everything below happens inside your sub-account. Most of it lives under Settings, at the bottom of the left-hand menu.
Step 1: Fill in your business profile
The business profile is the foundation. Its details appear in your emails, invoices and forms, feed the custom values you use in messages, and are used for compliance registrations later. Open Settings, Business Profile.
General information
- Business logo. HighLevel’s documentation recommends a logo of 350 by 180 pixels, a maximum file size of 2.5 MB, and ideally a PNG with a transparent background. The logo represents your account in lists and can be used in invoices and emails. Keep a square version of your logo too, for places that show a small icon, such as a chat widget.
- Friendly business name. The name your customers know. It fills the custom value
{{location.name}}wherever you use the account name in messages. - Legal business name. Exactly as it appears on your registration documents. HighLevel uses it for future compliance registrations, such as the texting registration in the United States (A2P 10DLC), so an abbreviation here causes problems later.
- Business email, phone and website. These fill the matching custom values in messages and workflows. If you will call and text from HighLevel, the business phone should be your HighLevel phone number.
- Currency. Set it before you create products or invoices.
Address, time zone and language
- Business physical address. Use the address on your official registration. It may be used to verify your business.
- Time zone. This one matters more than it looks. Automated messages and calendar availability use it to decide when things happen. A wrong time zone means reminders at 3 am.
- Platform and outbound language. The language of the interface and of system messages your contacts see.
Business information and authorized representative
Legal entity type, industry, registration number and an authorized representative (name, title, email, phone). You can leave these for later if you are not registering for texting yet, but fill them in before you do. The representative should be a real person who can confirm the registration.
The General settings: verification and compliance
Further down the business profile, the General section holds account-wide switches. Four deserve a decision on day one:
- Verify Email Address when first email is sent to a new contact. HighLevel checks a new contact’s email address before the first email goes out, and does not send to addresses marked invalid. Each check costs a fraction of a cent from your wallet (HighLevel lists $0.005). Turn it on. Sending to dead addresses is one of the fastest ways to damage your email reputation.
- Make Email compliant by adding an Unsubscribe link in your email. On by default. Leave it on: an unsubscribe link is required by law for marketing email in most countries and by Gmail and Yahoo for bulk senders.
- SMS Compliance Settings. Adds opt-out instructions to texts automatically. On by default; leave it on and adjust the wording if needed.
- Bot Detection. Stops bots from inflating your email statistics and triggering automations. Worth turning on, especially once you run email campaigns.
The same section holds settings for duplicate contacts and duplicate opportunities. The defaults are sensible for most businesses; come back to them if you see duplicates.
Branded domain (optional)
Also in the business profile: a branded domain for the links HighLevel generates for forms, surveys and calendars. Use a subdomain, such as links.yourbusiness.com, never your main domain, or your website stops pointing to your website.
Step 2: Set up your own profile
Your personal settings live under Settings, My Profile. Every user has their own.
- Personal information. Name, email (this is your login), phone and a profile picture. Your name and picture show up in conversations and on booking pages.
- Email signature. Set it once and it is used in the emails you send, including emails sent on your behalf by workflows when you are the assigned user.
- Password and two-factor authentication. Turn on two-factor authentication, ideally with an authenticator app. A CRM holds every customer’s details; a password alone is not enough.
- Availability. Your default working hours, used by calendars you are part of.
- Calendar connection. You can connect your own Google or Outlook calendar here as well. More on that in Step 5.
Step 3: Understand billing and the wallet
HighLevel costs come in two kinds: the fixed subscription and usage. Your subscription covers the platform. Usage covers what you consume: sending emails, calls and texts, AI, email verification and similar services. Usage is paid from the wallet.
You find it under Settings, Billing (sometimes labelled Company Billing).
How the wallet works
- The wallet is a prepaid balance. Each email, text, call minute or AI action deducts a small amount.
- Auto recharge tops it up automatically. You set a threshold and an amount, for example “add 50 when the balance falls below 10”.
- If the balance hits zero, usage-based services pause. Emails, texts and calls from workflows stop until the wallet is topped up. That is why auto recharge should always be on.
- Add a valid card. Without one, auto recharge cannot work and access can be restricted.
Who sets the fees depends on whose account it is
- Your own agency account. If you run your own HighLevel agency account, your sub-account’s usage is billed to you by HighLevel at HighLevel’s prices.
- An account provided by someone else. If your sub-account sits under someone else’s agency account, such as a consultant or service provider, the owner of that agency account sets the fees for your subscription and usage.
Monthly add-ons such as WhatsApp are usually charged to the card on file rather than taken from the wallet.
A practical tip: once you are live, check the wallet’s transaction history after your first week. It shows exactly what costs what, which makes the numbers easy to plan.
Step 4: Add your users
Everyone who works in the CRM should have their own login. Shared logins make it impossible to see who did what, assign conversations or give different people different access.
Users are added under Settings, My Staff (or Team), with Add Employee or Add User, depending on your version. For each user:
- Enter their name, email and phone.
- Choose the role: Admin can change settings, User works in the account without changing its setup. Give admin rights only to people who need them.
- Set permissions: which modules they see (for example Contacts, Conversations, Calendars, Opportunities, Payments), and more detailed rights inside some modules, such as whether a user can only see contacts assigned to them.
- Set their availability and connect their calendar, if they take bookings.
Two rules that save trouble later: every salesperson or team member who takes calls gets their own user, so bookings and conversations can be assigned properly; and when someone leaves, deactivate their user the same day.
Step 5: Connect your calendar and Google
Connect your own calendar before you create your first booking calendar, so HighLevel knows when you are busy. HighLevel works with both Google Calendar and Microsoft Outlook. Use whichever your business already runs on; there is no need to switch.
Google Calendar or Outlook: which applies to you?
| Google Calendar | Microsoft Outlook | |
|---|---|---|
| Use it if | Your business uses Google Workspace or a Gmail account | Your business uses Microsoft 365, Outlook.com, Hotmail or Live |
| Supported | Google Workspace and personal Google accounts | Office 365 / Microsoft 365, Outlook.com, live.com and Hotmail calendars |
| Not supported | On-premise Exchange servers, and calendars that only live in the Outlook desktop app without syncing to the cloud | |
| Accounts per user | One or more Google calendars from the connected account | One Outlook account per user in a sub-account |
| Check first | Your events show at calendar.google.com | Your events show in Outlook on the web (outlook.office.com/calendar) |
Two rules apply to both:
- The connection is per user. Each person who takes bookings connects their own calendar, under their own login. It is not one connection for the whole account.
- Write to one of them, not both. HighLevel writes new bookings into one calendar per user. If you use Google and Outlook side by side, pick one as the calendar bookings are written to, and use the other only to check for conflicts.
Connect it
Go to Calendars, Calendar Settings, Connections (or Settings, My Profile, calendar connection), click Add New, and choose Google or Outlook. Sign in and allow HighLevel (it may appear as LeadConnector) to access your calendar.
In a company Microsoft 365 account, your IT administrator may need to approve the connection before it works. If the sign-in stops with an approval message, that is the reason.
Decide which calendars block your time and where bookings go
After connecting, set two things. The labels differ slightly between Google and Outlook, but the idea is the same:
- Conflict calendars (Outlook: Check for Conflicts). The calendars HighLevel reads to block your availability. Choose every calendar that holds real appointments, so nobody can book you while you are at the dentist. Only events marked as busy block time; events marked free or tentative do not.
- Linked calendar (Outlook: Primary Calendar). The calendar new HighLevel bookings are written into, so they appear on your phone and in your usual calendar app.
Test it: create a private busy event in your Google or Outlook calendar and check that the time disappears from your booking calendar in HighLevel. Then book a test slot in HighLevel and check that it appears in your Google or Outlook calendar.
Google integrations
Under Settings, Integrations you connect your Google account for the Google services HighLevel works with: Google Business Profile (reviews and messages), Google Ads (reporting and conversions) and others. One Google login can authorize several of them. You need these even if your calendar runs on Outlook, because they are about your Google listing and ads, not your calendar. Connect the ones you use now; you can add the rest later. Google Business Profile is covered briefly at the end of this guide.
Step 6: Plan your custom fields and folders
HighLevel contacts come with standard fields: name, email, phone, address, company, date of birth and a few more. Everything specific to your business goes into custom fields. Plan them before building forms, because forms, workflows and filters all rely on them.
How to decide which fields you need
Ask one question for each piece of information: will we filter, automate or personalize by this? If yes, it deserves a field. If it is only a note for one conversation, it belongs in a note, not a field.
Examples for different businesses:
| Business | Useful custom fields |
|---|---|
| Home services | Service needed, property type, preferred date, how did you hear about us |
| Consulting or B2B | Company size, role, budget range, main challenge |
| Health or wellness | Program of interest, preferred location, first visit date |
| Any business with ads | UTM source, UTM medium, UTM campaign (see our guide to UTM parameters in HighLevel) |
Create folders first, then fields
Go to Settings, Custom Fields. Open the Folders tab and create a few folders that match how you think about a contact, for example:
- Lead details: what they want and when
- Qualification: budget, size, fit
- Lead source: UTM fields and how they found you
Then create the fields inside those folders. Choose the right field type: single line or multi line text, dropdown (single or multiple choice), radio buttons, checkbox, date, number, phone, email and more. Use dropdowns wherever the answers are predictable. “Kitchen”, “kitchen remodel” and “Kitchen reno” in a text field are three different values in every filter; one dropdown option is one.
Each field gets a key, such as {{contact.service_needed}}, which you use to insert its value in emails, texts and workflows.
Keep it short. Ten well-chosen fields beat forty half-used ones. You can always add more.
Step 7: Set up tags, including opt-in tags
Tags are simple labels on a contact. They are the fastest thing to filter, segment and automate by in HighLevel, so a small, consistent tag system pays off every day.
The difference between tags and fields
- Fields hold information with a value: the service needed is “kitchen remodel”.
- Tags mark a status or a group: the contact is a “customer”, attended the “webinar 2026-10”, or “opted in”.
Opt-in tags: the minimum for every lead entry
Every way a contact can enter your account (a form, a calendar booking, a chat, an import) should add an opt-in tag that records that they agreed to hear from you and where. This gives you a reliable filter for marketing emails and a record of consent.
A simple naming pattern:
optin: website form
optin: booking
optin: newsletter
optin: chat
Use one clear prefix, lowercase, and the same spelling every time. Tags are case sensitive in practice: Optin: Newsletter and optin: newsletter are two tags.
Create your tags up front under Settings, Tags, so everyone picks from the same list instead of inventing new spellings. A starting set for most businesses:
- Opt-in:
optin: website form,optin: booking,optin: newsletter - Lifecycle:
lead,customer,past customer - Interest: one tag per main service or product
A tag says someone opted in, but it is not the consent itself. For text messages in particular, consent has to be collected in the form with a proper consent checkbox, covered in the next step.
Step 8: Build your first form and embed it on your website
Most leads enter through a form: a contact form, a quote request or a sign-up. Build one now, then connect it to a workflow in Step 10.
Build the form
Go to Sites, Forms, Builder and create a new form. Start from a blank form or a template, then:
- Add the fields you need, and no more. Name, email and phone are standard. Add one or two of your custom fields, such as “service needed”. Every extra field costs submissions.
- Mark required fields. Usually email, or phone, or both.
- Add consent. If you will send text messages, add a consent checkbox that is not preselected and not required, with wording that names your business, says what messages they will get and how often, and includes “Message and data rates may apply” and “Reply STOP to opt out”. Use separate checkboxes for marketing and for non-marketing messages such as appointment reminders. Put links to your privacy policy and terms visibly on the form, since the checkbox text itself cannot hold links.
- Style it to match your website: colors, font, button text. A button that says “Get my free estimate” converts better than “Submit”.
- Set what happens after submission under the form’s options: show a thank-you message or send the visitor to a thank-you page.
- Save.
Embed it on your website
Click Integrate Form in the form builder. You can choose how it appears:
- Inline: part of the page, like any other content. Best for contact and quote pages.
- Popup: opens over the page, for example after a delay or on a button click.
- Polite slide-in: slides in from the side and can be minimized.
Copy the embed code and paste it into your website where the form should appear:
- WordPress: a Custom HTML block.
- Webflow, Squarespace, Wix and most builders: an embed or custom code block.
- HighLevel websites and funnels: no code needed; add the Form element and choose your form.
Then open the page, check it on your phone, and submit a test (you will do a full test in Step 12).
Step 9: Build your first calendar and embed it
A booking calendar lets people book time with you without the back-and-forth.
Choose the calendar type
Go to Calendars, Calendar Settings, Create Calendar. The main types:
| Calendar type | Use it when |
|---|---|
| Personal booking | One person takes the appointments. The right choice for most owner-led businesses. |
| Round robin | Several team members share the bookings, assigned by availability or in turn. |
| Class booking | One host, many attendees in the same session, such as a class or workshop. |
| Collective booking | Several team members must all attend the same meeting. |
| Service calendar | Customers book specific services, such as a salon or clinic. |
Set it up
- Name and description. Say what the call is for: “Free 30-minute estimate call”.
- Duration and buffer. The meeting length, plus a buffer before or after so meetings do not run into each other.
- Availability. Your bookable hours. Use your user availability, or set specific hours for this calendar.
- Booking rules. Minimum notice (for example no bookings less than 12 hours ahead), how far in advance people can book, and a daily limit if you need one.
- Meeting location. Phone, in person with the address, Google Meet or Zoom. HighLevel adds the details to the confirmation.
- Form and confirmation. Choose which details the booking form asks for, turn on the calendar’s consent checkbox if you will send text reminders, and choose what happens after booking: a thank-you message or a redirect.
- Notifications. HighLevel sends confirmations and reminders from the calendar; you can also send them from a workflow later for more control.
Embed it
Open the calendar’s menu (three dots), choose Share, then the Embed Code tab, and copy the code. Paste it into a custom code block on your website, exactly like the form. On a HighLevel landing page, use the Calendar element instead; no code needed.
Book a test appointment yourself and check that it appears in your linked Google or Outlook calendar.
Step 10: Build your first workflow: form, opt-in tag and confirmation email
Now connect the pieces. A workflow is a set of steps HighLevel runs automatically when something happens. Your first one does three things when someone submits your form: marks them with an opt-in tag, confirms their request by email, and tells you.
Go to Automation, Workflows, Create Workflow, start from scratch, and name it clearly, for example “Website form: tag and confirm”.
- Trigger: Form Submitted. Click Add New Trigger, choose Form Submitted, then add the filter Form is and pick your form. Without the filter, the workflow fires for every form in the account.
- Action: Add Contact Tag. Add
optin: website form, plus aleadtag if you use lifecycle tags. - Action: Send Email to the contact. The confirmation: thank them, say what happens next and when, and sign with your name. Use custom values like
{{contact.first_name}}to personalize it. (Writing the email itself is its own topic; keep it short and human.) - Action: Internal Notification (or Send Email to yourself). Send yourself the contact’s details and their answers, so you can respond quickly.
- Publish. Workflows are saved as drafts until you switch them to Publish. A draft workflow does nothing.
Two settings in the workflow’s Settings tab to check: Allow re-entry (whether the same contact can go through the workflow again if they submit the form twice; usually yes for a contact form) and the sender name and email for this workflow’s emails.
Do the same for your calendar with the Appointment Status or Customer Booked Appointment trigger and the optin: booking tag.
Step 11: Configure your email sending domain
Without your own sending domain, HighLevel sends your emails from a shared domain. That is fine for a handful of emails while you build, but not for real volume. Your emails should come from your own brand and build your own sending reputation.
Use a subdomain
Set up a subdomain just for HighLevel’s email, such as mail.yourbusiness.com or send.yourbusiness.com. Your main domain keeps working for Google Workspace or Microsoft 365, and the two do not interfere.
Set it up
- Go to Settings, Email Services, Dedicated Domain and IP and Add Domain.
- Enter the subdomain, for example
mail.yourbusiness.com. - HighLevel shows the DNS records to add: typically TXT records for SPF, a CNAME or TXT record for DKIM, MX records for replies and bounces, and a CNAME for click tracking.
- Add those records at your domain provider (GoDaddy, Cloudflare, Namecheap, Google Domains and so on), exactly as shown.
- Back in HighLevel, click Verify. DNS changes can take anywhere from minutes to a few hours.
Add DMARC
Make sure your domain has a DMARC record. Gmail and Yahoo require SPF, DKIM and DMARC for anyone sending in bulk. Start with a monitoring policy such as v=DMARC1; p=none; rua=mailto:you@yourbusiness.com and tighten it later once everything passes; HighLevel’s own guide recommends working toward p=reject.
One common mistake: a domain can have only one SPF record. If your main domain already has one for Google Workspace or Microsoft 365 and you add HighLevel’s to the same domain, merge them into a single record. Using a subdomain for HighLevel avoids the problem entirely.
Set your default sender
Choose the from name and from email your emails use, such as “Anna at Your Business” and anna@mail.yourbusiness.com, and make sure replies go to an inbox someone reads.
Warm the domain up gradually before sending large campaigns; see the overview at the end.
Step 12: Create your first contact and test everything
Before you point real traffic at anything, test the full path yourself.
Create a contact by hand
Go to Contacts, click Add Contact, and enter a contact: yourself, with a real email address and phone number you can check. Add a tag and a custom field value. This confirms that your fields and tags look right on a contact record. Contacts added this way are marked as created in the CRM, so they do not show a web source.
Test the form
- Open your website in a private browser window, so nothing is remembered from earlier visits.
- Submit your form with a different email address of your own, ideally one with
+testadded, such asyou+test1@gmail.com. - Check, in this order:
- The contact appears in Contacts with the right fields filled in.
- The opt-in tag is on the contact.
- The confirmation email arrived, in the inbox rather than spam, and looks right on your phone.
- Your internal notification arrived.
- The workflow’s execution log shows every step completed.
- Book a test appointment on your calendar and check the confirmation, the tag and the event in your Google or Outlook calendar.
If something is missing, the workflow’s execution log almost always shows why: the wrong form in the trigger filter, a draft instead of a published workflow, or an email step without a sender.
Delete your test contacts afterwards, or tag them test and exclude that tag from reports.
What could you do next?
The steps above give you a working foundation: leads come in, get tagged, get a response and land in your CRM. What comes next depends entirely on your business and what you need most.
Below are a few common next steps, as ideas rather than a to-do list. HighLevel can do a lot more than this, and you will likely never need all of it. Pick the one that would make the biggest difference right now, set it up properly, and add the next when you are ready.
Products and payments
Connect Stripe (or another payment provider) under Payments, create products, and take payments through invoices, payment links, order forms and online stores. Useful for deposits, paid consultations and recurring services.
Landing pages and websites
Build landing pages, funnels and full websites under Sites, connected to your domain. Forms and calendars drop straight in without embed codes, and every visit is tracked in the CRM.
More workflows
Appointment reminders, follow-ups for leads who do not book, review requests after a job, re-engagement for quiet contacts, internal task assignments. A handful of well-built workflows usually does more than dozens of half-finished ones.
Opportunities and pipelines
Track deals through stages, from new lead to quoted to won, under Opportunities. Workflows can create and move opportunities automatically, and dashboards show your pipeline value and conversion rates.
Google Business Profile and review management
Connect your Google Business Profile to reply to reviews and Google messages from HighLevel, and send review requests automatically after each job. More reviews is one of the most reliable ways to win more local business.
Email warm-up and authentication
A new sending domain needs to build a reputation. HighLevel limits daily sending during warm-up (its guide lists stages such as up to 1,000 emails per day, then 2,500) and recommends sending only to engaged, opted-in contacts at first. Monitor your domain with Google Postmaster Tools and keep SPF, DKIM and DMARC passing.
Chat widgets and WhatsApp
Add a chat widget to your website so visitors can message you, with replies landing in the same Conversations inbox as email and text. Connect WhatsApp for customers who prefer it.
Tracking and UTM parameters
Find out which ads, posts and emails bring leads and revenue by tagging your links and capturing the source on every contact. Our complete guide covers it in depth: UTM parameters in HighLevel.
AI agents
HighLevel’s AI tools can answer common questions in chat and text (Conversation AI), take and make phone calls (Voice AI), build more advanced agents (Agent Studio), and help write emails, pages and workflows. Some are pay-per-use and some come with AI plans, so check the pricing in your account before switching them on.
And much more
Surveys, memberships and courses, communities, social media planning, invoicing and estimates, reporting dashboards, affiliate programs, and more. You do not need any of it until it solves a real problem for your business. When it does, it is usually already there, waiting to be set up.
Your setup checklist
- Business profile: logo, names, email, phone, website, address, time zone
- Email verification, unsubscribe link, SMS compliance and bot detection switched on
- Your profile: signature, two-factor authentication, availability
- Billing: card added, wallet funded, auto recharge on
- Users added with the right roles and permissions
- Google or Outlook calendar connected, with conflict and linked calendars set
- Custom fields created in folders
- Tags created, including opt-in tags
- First form built with consent and embedded on your website
- First calendar built and embedded
- First workflow published: form, opt-in tag, confirmation email, notification
- Email sending domain verified, DMARC in place, default sender set
- Full test done with a real contact
Sources
- HighLevel: Business profile settings and General settings, toggles and compliance
- HighLevel: Business profile
- HighLevel: Agency company settings (logo size recommendation)
- HighLevel: Wallets explained
- HighLevel: Managing user roles and permissions
- HighLevel: Authenticator app support for two-factor authentication
- HighLevel: Integrating Google with HighLevel calendars, Syncing HighLevel calendars with Outlook and Linked and conflict calendars
- HighLevel: Creating and managing custom fields
- HighLevel: Embedding options for forms
- HighLevel: Setting up a booking calendar and Embedding calendars using HTML code
- HighLevel: Consent checkbox for compliance and A2P 10DLC campaign approval best practices
- HighLevel: Setting up domain types, including the email sending domain
- HighLevel: Email sending guide: best practices and warm-up
- HighLevel: Creating a new contact
- HighLevel: AI tools in HighLevel
FAQ
Frequently asked questions
What is a HighLevel sub-account?
A sub-account is one business's own space inside HighLevel. It holds that business's contacts, conversations, calendars, forms, workflows, websites and settings, separate from every other sub-account. If you bought a CRM account from an agency or consultant, what you log into is a sub-account.
In what order should I set up a new HighLevel sub-account?
Business profile first, then your own profile and users, then billing and the wallet, then integrations such as Google Calendar. After that, plan custom fields and tags, build your first form and calendar, connect them with a first workflow, configure your email sending domain, and finish by testing everything with a real contact.
What size should my logo be in HighLevel?
HighLevel's documentation recommends a logo of 350 by 180 pixels with a maximum file size of 2.5 MB, ideally a PNG with a transparent background. Keep a square version of the logo as well, for places that show a small round or square icon.
What is the HighLevel wallet?
The wallet is a prepaid balance that pays for usage-based services such as email sending, phone calls, text messages and AI. Each use deducts a small amount. With auto recharge on, the wallet tops itself up from your card when the balance falls below a threshold you choose. If it reaches zero, those services pause until it is topped up.
Should I turn on email verification for new contacts?
For most businesses, yes. The setting checks a new contact's email address before the first email is sent and skips invalid addresses, which protects your sending reputation. Each check costs a fraction of a cent from the wallet.
Do I need my own email sending domain in HighLevel?
If you send more than the occasional email, yes. A dedicated sending domain, set up on a subdomain such as mail.yourbusiness.com with its SPF, DKIM and DMARC records, lets your emails come from your own brand and builds your own sending reputation instead of sharing one.
What is an opt-in tag and why do I need one?
An opt-in tag records that a contact agreed to hear from you, and where they did it, for example optin: website form. Adding it automatically in the first workflow after every lead entry gives you a reliable way to filter marketing lists and a record of consent.
Does HighLevel work with Outlook calendars or only Google?
Both. Each user can connect Google Calendar or a Microsoft Outlook calendar (Microsoft 365, Outlook.com, Hotmail or Live). On-premise Exchange servers are not supported. HighLevel writes bookings into one calendar per user, so if you use both, choose one for new bookings and use the other only to block conflicts.
Can I embed HighLevel forms and calendars on my WordPress or other website?
Yes. Every form has an embed code under Integrate Form, and every calendar has one under Share, Embed Code. Paste the code into an HTML or custom code block on your website. On a HighLevel landing page you can add the form or calendar element directly without any code.

Written by
Konstantin von BrockeFounder of Ímpetu Consulting. Konstantin runs marketing, websites and CRM systems for owner-led businesses, and builds the tracking that shows which of it pays off.